Nov 29, 2018 · 6 min read
This article describes a way to periodically move on-premise Cassandra data to S3 for analysis. We’re been using this approach successfully over the last few months in order to get the best of both worlds for an early-stage platform such as 1200.aero: The cost effectiveness of on-premise hosting for a stable, live workload, and the on-demand scalability of AWS for data analysis and machine learning.
Our end goal was to upload data to S3 organized as follows:
/adsb/messages/year=2018/month=11/day=06
To that effect, we performed the following steps, described in detail in this article:
- Reorganize the data using Cassandra materialized views
- Use Spark to read Cassandra data efficiently as a time series
- Partition the Spark dataset as a time series
- Save the dataset to S3 as Parquet
- Analyze the data in AWS
For your reference, we used Cassandra 3.11 and Spark 2.3.1, both straight open source versions.
1. Building a Django POST face-detection API using OpenCV and Haar Cascades
2. Understanding and building Generative Adversarial Networks(GANs)
Step 1: Reorganize the data
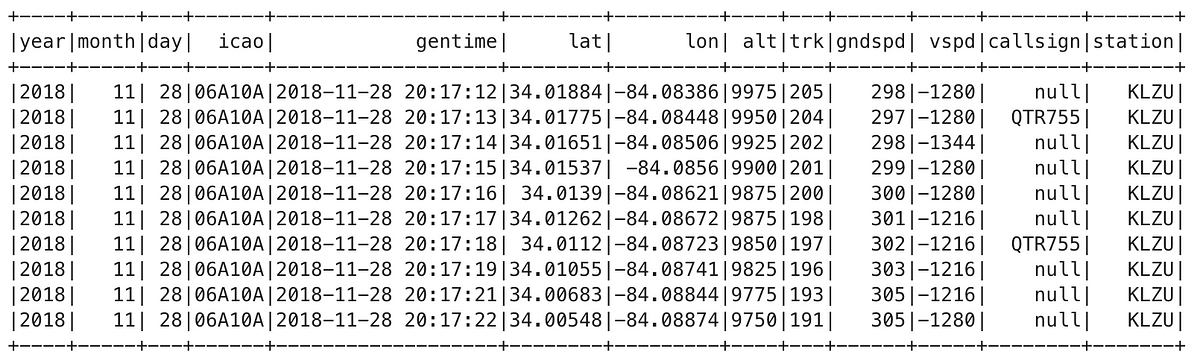
The data we want to analyze consists of millions of low-altitude air traffic messages captured from ADS-B receivers at a number of regional airports. The original table definition is:
CREATE TABLE messages (
icao text,
gentime timestamp,
alert boolean,
alt int,
callsign text,
emerg boolean,
gndspd int,
ident boolean,
isgnd boolean,
lat float,
lon float,
sqwk text,
station text,
trk int,
vspd int,
PRIMARY KEY (icao, gentime)
) WITH CLUSTERING ORDER BY (gentime ASC)
Notice the primary key is (icao, gentime). Cassandra data models are designed with a specific data retrieval use case in mind. Our applications query data by aircraft identifier, so our partitioning column is the aircraft’s icao (a 6-character hex transponder code), followed by gentime (a timestamp) as the clustering column that orders records chronologically within each partition.
Problem: In order to periodically export a day/week/month’s worth of data, we needed to be able to retrieve records by date. Since such attribute did not originally exist, we had to:
- Create and populate a new day column on the existing table.
- Define the right Cassandra data structure to enable efficient data retrieval using the new day column.
- Update our backend to populate the new field for incoming data.
Defining a new date column in Cassandra is straightforward:
alter table messages add day date;
However, populating it proved more complex than anticipated: We had to update several hundred million records and did not find a suitable CQL UPDATE statement to do so in place (i.e. deriving day from the gentime timestamp). After evaluating all alternatives, we ended up doing this:
Export the primary key for every record to a CSV file using CQL:
copy messages(icao, gentime) to ‘messages_pk_all.csv’ with header = false;
Output file:
A3A23C,2017–10–06 15:37:06.000+0000
A3A23C,2017–10–06 15:37:07.000+0000
A3A23C,2017–10–06 15:37:08.000+0000
A3A23C,2017–10–06 15:37:09.000+0000
A3A23C,2017–10–06 15:37:11.000+0000
Update the file in Unix to create a new field based on the existing timestamp:
cat messages_pk_all.csv | tr -dc '[:print:]\n' | awk -F "," '{ split($2, subfield, " "); print $1 "," $2 "," subfield[1] }' > messages_pk_day.csvThe above yielded a file with the new attribute:
A3A23C,2017–10–06 15:37:06.000+0000,2017–10–06
A3A23C,2017–10–06 15:37:07.000+0000,2017–10–06
A3A23C,2017–10–06 15:37:08.000+0000,2017–10–06
A3A23C,2017–10–06 15:37:09.000+0000,2017–10–06
A3A23C,2017–10–06 15:37:11.000+0000,2017–10–06
Import the modified file into the same table, which updates every record with just the new column value, leaving all other fields intact:
copy messages(icao, gentime, day) from ‘messages_pk_day.csv’;
The import took several hours, but worked flawlessly. In hindsight, it’s still far from ideal and required some research to guarantee the safety of the data, but given the lack of support in Cassandra, it’s as good a solution we could find.
Prior to creating our first Cassandra materialized view, we considered secondary indexes. However, the many caveats and words of caution from experienced users led us in the direction of materialized views.
CREATE MATERIALIZED VIEW messages_by_day AS
SELECT *
FROM messages
WHERE day IS NOT NULL AND icao IS NOT NULL AND gentime IS NOT NULL
PRIMARY KEY (day, icao, gentime)
WITH CLUSTERING ORDER BY (icao ASC, gentime ASC)
Materialized view creation ran in background for ~12 hours as it duplicated and organized the data. This query reports any builds in progress:
SELECT view_name, generation_number, last_token
FROM system.views_builds_in_progress;view_name       | generation_number | last_token
----------------+-------------------+--------------------
messages_by_day |                 0 | 2527298856676644032
To date, we have not observed a significant performance overhead associated with the materialized view. DataStax found that every materialized view takes away ~10% of the insert performance on a given table.
Step 2: Read Cassandra data efficiently as a time series using Spark
Once we had the means to retrieve the data by date, we had to ensure that the Spark Cassandra connector issued the right queries to retrieve the data efficiently.
Spark configuration parameters for the Cassandra connector (passed when creating a SparkConf, via spark-submit, sparkmagic in Jupyter, etc):
spark.cassandra.connection.host: “host1,host2”,
spark.cassandra.auth.username: “username”,
spark.cassandra.auth.password: “password”,
spark.cassandra.input.consistency.level: ALL
Import the right packages, define a dataset on the Cassandra table:
import org.apache.spark.sql._
import org.apache.spark.sql.cassandra._val messagesDf = spark.read.cassandraFormat(“messages_by_day”, “adsb”).load()
Filter data for a specific date:
import java.sql.Dateval messagesLastDayDf = messagesDf.filter(messagesDf("day") === Date.valueOf("2018-11-06"))…or for a number of dates (discrete dates must be specified in an IN condition):
val messagesLastWeekDf = messagesDf.filter(messagesDf(“day”) isin (Date.valueOf("2018-11-06"), Date.valueOf("2018-11-05"), Date.valueOf("2018-11-04"), ... ))To verify that your filter will be applied to the Cassandra table, print the physical plan with df.explain(). There should be predicates (i.e. actual values) being pushed down to the data source, as in these examples:
messagesLastDayDf.explain()
PushedFilters: [IsNotNull(day), *EqualTo(day,2018-11-06)]messagesLastWeekDf.explain()
PushedFilters: [*In(day, [2018-11-06,2018-11-05,2018-11-04])]
Important: Attempts to filter the dataset that don’t conform to the connector documentation will cause Spark to issue a full table scan to Cassandra (and thus defeat the purpose of reorganizing your data as done in Step 1).
Step 3: Partition the Spark dataset as a time series
As a reminder, our goal was to lay the data in S3 partitioned by date, example:
/adsb/messages/year=2018/month=11/day=06
So, rather than partitioning the dataset by the whole date string (e.g. "2018–11–06"), we needed to partition by its components (year, month, day). Hence, we had to first convert the day column into year, month and day columns:
val partMsgsLastWeekDf = messagesLastWeekDf.withColumnRenamed(“day”, “date”).withColumn(“year”, year(col(“date”))).withColumn(“month”, month(col(“date”))).withColumn(“day”, dayofmonth(col(“date”))).drop(“date”)
At long last, we had our data available in Spark with the necessary attributes and partitioned by the criteria we needed.
Step 4: Save your Spark dataset to S3 as Parquet
Setting up Spark to push data to S3 was pretty easy. Required AWS libraries are included in the Hadoop distribution Spark depends upon. All we had to configure were the following five entries in $SPARK_HOME/conf/spark-defaults.conf:
spark.executor.extraClassPath /opt/hadoop-2.7.7/share/hadoop/tools/lib/aws-java-sdk-1.7.4.jar:/opt/hadoop-2.7.7/share/hadoop/tools/lib/hadoop-aws-2.7.7.jarspark.driver.extraClassPath /opt/hadoop-2.7.7/share/hadoop/tools/lib/aws-java-sdk-1.7.4.jar:/opt/hadoop-2.7.7/share/hadoop/tools/lib/hadoop-aws-2.7.7.jarspark.hadoop.fs.s3a.impl org.apache.hadoop.fs.s3a.S3AFileSystemspark.hadoop.fs.s3a.awsAccessKeyId <your AWS access key id>
spark.hadoop.fs.s3a.awsSecretAccessKey <your AWS secret access key>
Now we were ready to partition and push the data to S3 in a single instruction:
partMsgsLastWeekDf.write.partitionBy(“year”, “month”, “day”).mode(SaveMode.Append).parquet(“s3a://mybucket/adsb/messages”)
Performance of the above statement is surprisingly fast (in part due to Parquet files being much smaller than their CSV equivalents). Loading a day’s worth of records (~500,000 rows) completes in less than one minute.
We use SaveMode.Append to make it possible to load additional days without deleting existing data.
Note: The s3a URL prefix has desirable performance and capacity implications for large file operations such as Parquet.
Step 5: Analyze your data in AWS
From here, sky is the limit. You can spin an EMR cluster and query S3 directly with an arbitrary number of cluster nodes. Alternatively, you can also launch a Sagemaker notebook and point it to EMR Spark following similar steps to those outlined in my previous article. And, as of the time of writing, Boto3, the AWS SDK for Python, now makes it possible to issue basic SQL queries against Parquet files in S3.
Future articles will describe how 1200.aero is using these data to predict potentially hazardous situations for general aviation aircraft.